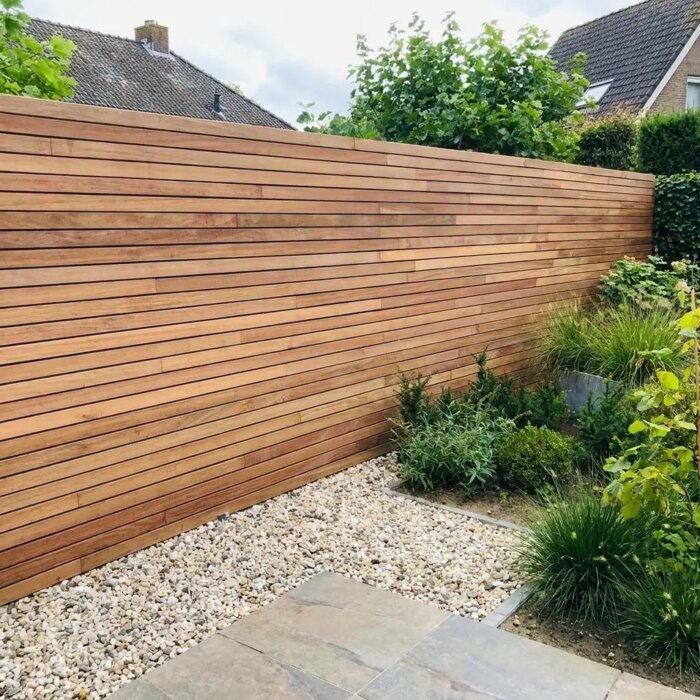

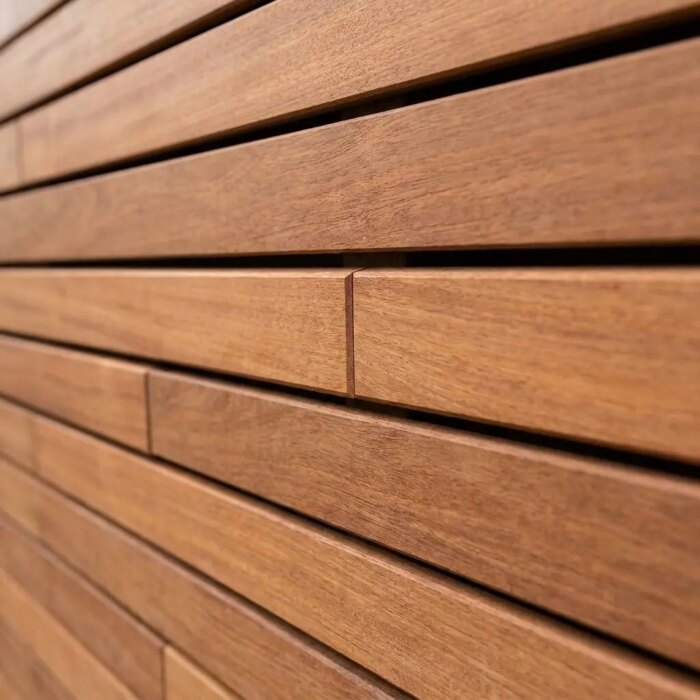
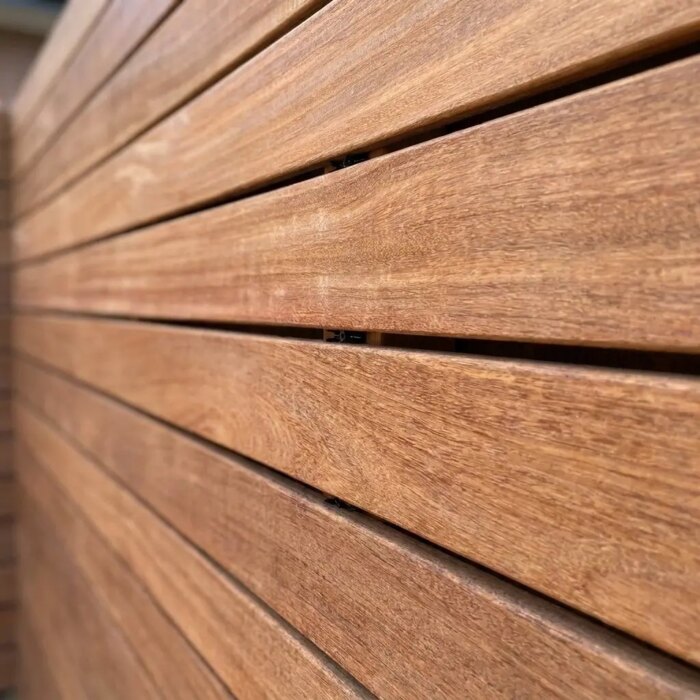
Joining fence slats end to end: staggered Ipe slats
Why stagger the joints on a fence
On a traditional fence every slat ends on a post. All the joints line up, and you can see exactly where each post is. With tongue and groove ends you do not need to do that. The joints step from row to row and the whole run reads as one continuous wall, with the Azobe (ekki) posts hidden behind it. It also saves timber, because the offcut at the end of one row starts the next.
How to lay the slats
1. Posts and the first row
The Azobe posts of 60 x 60 mm go in the ground. Set the bottom slat dead level, because it sets the line for the whole fence. A few millimetres out at the bottom will show at the top.
2. Clips in the edge groove
Each slat has a groove along its long edge. The clip sits in that groove and is fixed to the post with a black coated stainless steel screw. The clip doubles as the spacer, so the gap is 5 mm everywhere, and no screws show from the front.

3. Staggering the end joints
Push the tongue of the next slat into the groove of the last one. Make sure the joints in neighbouring rows never fall in the same place, so no vertical line appears. There is no fixed spacing to stick to, as long as it varies.
The double V
Each slat end has a small chamfer. Where two slats meet, you see a narrow double V across the height of that one slat. It is the same detail as on our decking boards. A plain butt joint without a chamfer soon looks untidy; this one looks deliberate.

The honest downside
You will still see the joints. Up close there is a double V here and there across the fence. Staggered, they are spread out and blend into the lines of the slats, but you will not get a run with no joints at all.
In short
- Tongue and groove ends: the slats lock together lengthways, even between two posts.
- Stagger the joints from row to row, never two directly above each other.
- Finish the start and end of the fence on the first and last post.
- Use up the offcuts to keep waste low.
- An EPDM membrane behind the slats is available as an option, for privacy and less noise.
Frequently asked questions
Does an end joint have to sit on a post?
No. The tongue and groove keeps two slats in line even between posts, so the joints can fall anywhere.
How many slats will I need?
That depends on the slat width and the height of your fence. See how many fence slats per metre for the sums.
Does this work with teak too?
Yes. Our teak slatted fencing uses the same fixing system with tongue and groove ends, so you lay those slats staggered as well.
Browse our Ipe slatted fence range in 50, 70 or 90 mm slats, or plan your fence with the fence calculator.
Tags for this article: